DIY: round straw bag
EN
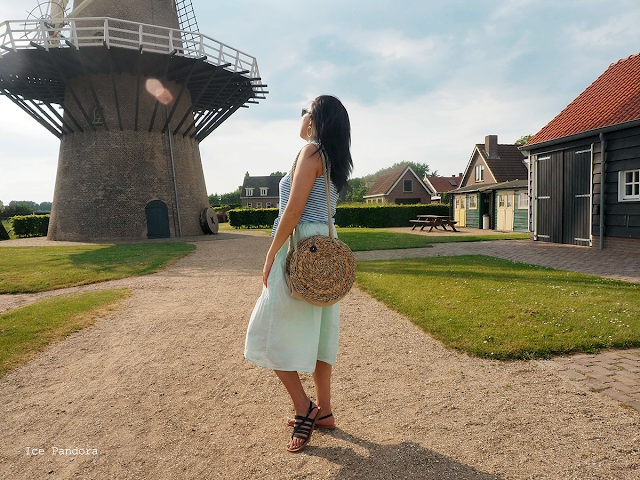
When it comes to trends in fashionland I do not always follow them. I think this is one of the perks of getting older and growing wiser and be immune for fast-fashion. That saves me some money too! But sometimes there are good trends that you want to be part of the trend-bandwagon. Like this round shaped straw woven/rattan bag that I've been seeing around social media. I have to admit it's cute!
And I want one. Too bad the ones I find in stores are pretty (over)pricey. Since I refuse to pay for an overpriced bag I've decided to DIY and made my own and you can too! |
NL
Wanneer het op trend aankomt in de modewereld volg ik deze niet altijd. Een voordeel bij het ouder worden denk ik en waarschijnlijk ook wijzer en steeds immuun ben voor ' snelle-mode'. Ook goed voor m'n portemonnee. Maar soms zitten er goeie trends bij waar ikzelf graag gezien mee wil worden, zoals deze rond geweven tassen van riet of rotan. Deze zie ik veel in sociale media en toegeven het is best cute en ik wil er een.
Ook toegegeven is dat deze tassen best prijzig zijn. Ik weiger dan ook eentje te kopen en in plaats daarvan heb ik eentje handgemaakt en jij kan het ook doen! |
You`ll Need
2 woven straw/rattan coasters -- linen cloth -- (nautical) thick rope -- cotton thread -- a button -- a needle - scissors -- a pen -- braided cord -- measuring tape line
instructions
little math
To cut the right length of the linen cloth we need a little help of math. Cut ¾ length of the coasters circumference. So let`s first measure the circumference of the coasters with a measuring tape - mine is 94,25 cm with a diameter of 30 cm. Divide this by 1⁄4 and you`ll have: 23.56 cm. Then you deduction this from 94.25 and you`ll have the length of: 70.69 cm which is the length you`ll be cutting. If you want to have a wider opening in your bag just shorten the length (mine went down to 62 cm eventually). Then the width - mine is 10 cm. Depending on how much storing space you want, you can decide the with. Just don`t make it too wide or you`ll have excess cloth underneath hanging loose.
& hem
Once the linnen piece is cut, hem the short edges with cotton thread and needle, leave a long tail and tuck and secure this long tail inside the hemmed part.
& attach
Cut off a long piece of cotton thread, about twice the length of the linen. Blanket stitch the long edge of the linen to the outside ring of the coasters until everything is sewn on. Personally I find it easier stitching when the coaster is standing up.
Attach the second coaster on the other side of the edge the same way as the first coaster.
& unravel
Unravel the end of the rope to get separate tiny threads. Pull these tiny threads through the separate holes of the coaster tie a double knot on the inside
to secure.
& closure
Place the button on the outside of the coaster and sew it on. Use any desired thread/cord/rope for the closure strap. Measure this strap with the length that is long enough to extend from one side of the coaster to the other side. Make a loop and stitch and sew it on the coaster.
& done!
Well done you have got yourself a one of kind Summer bag!
♥


You have outdone yourself, this is actual genius! Making a bag out of coasters! I love it.
ReplyDeleteAwww! Thank you dearest Janeeeeee <3 Xx
DeleteSO CUTE!! I bought the one I have, but I've been looking for a bigger one and they're all too big on me. I may custom-make myself one, tooo...
ReplyDeleteThank you Sandy ^__^
Deletethe other day I bought 2 smaller coasters and planning to make
a smaller handbag version :P Please let me know if you've made
one yourself! I'd love to see it c: Xx
You are the DIY queen! This is so on trend, and who knew coasters could look so good? :D -Audrey | Brunch at Audrey's
ReplyDeleteThank you Audreyyyy!! These are super on trend haha, so I've decided to join the
Deletecool-gang bandwagon :P with my own unique bag of course c: Xx
This is so clever - I love how you've done this
ReplyDeleteThank you Rooth ^___^ Xx
DeleteLove!
ReplyDeleteThank youuuuuuu ^___^ Xx
Delete